::visitor counter::
free hit counter

[ Click on thumbnails below to see all the posts of my babies and passion ]
Photobucket Photobucket Photobucket Photobucket Photobucket Photobucket Photobucket Photobucket Photobucket Photobucket

Monday, November 12, 2007

Back from WINTON!! 1:54s with the MICRA!!! ^_^

Winton Trackday by Tampered Motorsports - 6 / 11 / 2007
first PB set on the Micra: 1:54.4650

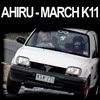
thx to charlie Kang for the pics:
Photobucket Photobucket Photobucket Photobucket


many ppl asked why i didnt bring the 350z, and why would i bother wasting my time with micra... well my answer is:

1. i would bring and drive any car to the track anyway...
2. at this stage i'm not going any faster with the 350z after 4 attempts resulting in 1:41s. i promised myself to try a different change then back to the zed again. sometime you didnt realised that you have overlooked few simple things just because you have been taking it for granted...


well this is my first time in the micra, 1.3lt 55kw 103Nm, 800kg. spec on the day was DIY PVC intake kit Razz, nissan pulsar front brake + RDA slotted, im using low treaded bridgestone that i got free from dan c2888... its 185/60/14.... thx dan... they are still very good compared to the bald one i has previously...

on the first session of the day i was lucky to be able to clocked PB of 1:54.4650... after that, i never get close to 1:54 anymore (was only 1:55-1:56 with few slower run with passenger)

at first, its abit hard driving the micra, coming from the 350z... i used to have all this torque and any mistake i made wont be significance as i can just plant the accelerator and it will look like nothing has ever happened...

with the micra, i have to try so hard to keep the momentum up. the slightest mistake i made will cost me few sec and i will never see those sec again coz i just dont have the power to make up for it. this reminds me alot how important it is to shift the weight properly and keeping the momentum around the corner... get all the braking done before the corner, and only brake when you really need to, no more messing around, accelerate all the way whenever you had a chance....

i even got few oversteer that i would never be able to catch if i havent driven rwd before... and lift off on micra is a no no. its eaither im on the brake, or on the accelerator.... never in between....

at the end of the day, i was surprised that the micra has reminded me few things about driving that i have forgotten since i started driving the 350z. it is a great little car with a great solid built. perfect gear ratio for its power made the car feel more sophisticated and not slow at all... i must say i love the micra and will definitely keeping it for the long term along with the 350z....

Overall results on the day: http://www.natsoft.com.au/cgi-bin/results.cgi?06/11/2007.WIN.P1
Individual results: http://www.natsoft.com.au/cgi-bin/results.cgi?06/11/2007.WIN.P1.I

Front brake Upgrade! :)

Front Brake Upgrade:

caliper comparison:
left - stock micra 1.3 ; right - nissan pulsar N14 2.0


piston comparison: left is the pulsar one, right is the micra one...


micra stock rotors VS RDA slotted for nissan pulsar 2.0

thx for Johnny from On the run motorsport for supplying the rotors! $170 for a front pair is quiet a bargain....

installation was pretty straight forward. its a straight swap. all i need is just 1.4mm washer from bunning cost $0.20 each...


done, the cheapest brake upgrade ever! Smile


another minor details:
removed the glue/double sided tape residue off the old side moulding by using the 'caramel' wheel i got from the paint shop... thx for shaun, and jally for helping me doing this...


and thx to dan c2888 for helping me fixing the sagging door Smile i pick up replacement hinges for $10 each...

Nissan Pulsar 2.0 Front Brake

went to self serve wrecker and found this babies....


Brake Caliper from Nissan N14 Pulsar SR20DE
it should be straight bolt on with 1mm washer...
it has 53mm piston and this will take 252mm x 20mm, vented rotor (compared to stock micra CG13DE caliper with 47mm piston, solid rotor, 234mm x 12mm)

they are not pretty, but does a good job and wont fade after 3 corners like stock micra brake... i will clean them soon... Smile

i pick them up for $28 each, and the guy didnt even charged me for the brake pad (supposed to be $20 for the pads and its still very thick). i didnt take the N14 disk rotor coz they were all in very poor condition...

next: RDA slotted vented rotor...

Sunday, November 11, 2007

baby shoes!

lol... saw this at K-Mart... baby shoes size 1... can't help it... i just have to have it...

put it in the micra now Razz

Friday, October 26, 2007

MY CAR IS BACK!!! :P DEBADGED, NEW BONNET, & ROOF!!! woohooo

the car is back from repair... wooohooooooo


stock:


in progress:


fixed the L&R guard, debadged front and back, remove number plate black holder (i will replace this with a bracket), fill up the dip at the front left by the front badge, 2007 bonnet, new roof....

after debadged, new bonnet and new roof:


the sexy hump... Razz many ppl dont like this 2007 bonnet. it doesnt appeal to me at first, but the more i look at it, the more i like it..


havent take pic from the back, but the back is debadged too... Smile

thx to mic for giving me a lift.... Smile

Tuesday, October 16, 2007

Tint + Steering + Watanabes

Tinting

got it done for $150.

before


after


Steering Wheels


pick this up from wrecker for $30. for the boss kit, micra dont have the specific one made, but you can use the one for S13, N14 and N15 pulsar... i bought it new from GA Tech for $30... Big Thx to Cain for picking it up for me... sorry for the trouble bro... Razz also thx to Dan C2888 for installing this for me... lol... ur so quick man... it would probably take me the whole day... Laughing


Watanabe

pick this up from Adrian (ES). its Watanabe 14x6 offset +40. i always love them and finally got one myself... yay... so happy Razz

DIY Short Shifter

DIY Short Shifter

i picked up a spare standard gear shifter for $10. thx to tracy for picking it up for me Smile thx to dan for the infos and welding Razz


basically the shifter was shorter at the part above the pivot point and extended at the part below the pivot point. in this case the top is shorten by 70mm, and 30mm extension at the bottom. dan did all the cutting welding...


to remove the shifter in micra, i hard to do it from under the car. its just above the secondary cat converter.

because the short shifter has longer bottom part, its rubbing the heat shield above the cat conv. so i decided to reshaped the heat shield to make some clearance... Razz

green dotted like was the original shape. blue line is the shape after i bent it


put the spare gear know i had lying around in the garage. its off ford focus.

thx to shaun for helping me Smile

here is abit of video of the short shifting after the installation.

Link

DIY Cold Air Intake (CAI) - PVC piping

DIY Cold Air Intake (CAI) - PVC piping

with only 55kw at the engine, micra pulls pretty hard from factory. i think its because of the gear ratio and the lightweight body... but as usual, it still felt restricted...

ok, so i tested the micra in a 'safe controlled environment' Razz i got it up to 145kmh... and after 1minute, lol, it eventually reach 150kmh (4th)... it just wouldnt go anymore.... even after i shift to 5th, it stays there...

so, i'm making this cold air intake, hope it will help the response and help the starvation at top end... originally me and shaun made it just a short ram and run the pipe to the side of the engine, but i cannot be bothered buying another agled PVC to make the air feed to the pod filter... so i recided to collect direct cold air from behind the front grill.

i bought 1 meter of 65mm PVC($13), 90degree 65mm ($6), and 45degree 65mm ($6), acrylic gap sealer ($1.50), insulation tape ($12), 65mm coupler ($2), PVC pipe braket ($1.30)... the intake pod filter is free, from shaun(thx man)... Razz the heat shield is from the left over aluminium sheet i had from the 350Z.


here we go:


  1. i make up the first mock up, to make sure i can close the bonnet Smile


  2. the pod filter that i get from shaun has metal surround and its separable from the rubber mount. since the inside has no funnel shaped rubber, i decided to split the pod filter and put one funnel inside using 65mm coupler


  3. so, i heat up the end of the coupler with heat gun and push it against a normal plastic funnel.


  4. here it is once its done. nice little trumpet... probably most ppl think it wont make any different. i just think every little bit counts.


  5. put the PVC funnel back into the pod filter


  6. reattach the rubber mount


  7. now pull out the PVC funnel, it should stop once the funnel reach the rubber mount neck. this will make sure that the funnel sits at the bottom / exit of the pod filter


    here is the inside view


  8. since the pod is going to sit between the grill and the header, i made a aluminium shield to cover it from radiant heat.


  9. mock up setting done...


  10. clamp it with PVC bracket and made up an 'L' shaped metal bracket to hold the pipe in place.


  11. i put this protective insulation tape to protect the piping from engine heat. it might me overkill here (coz PVC might have some sort of heat resistance already), but i better be safe.


  12. i use the stock nipple from the stock airbox to mount the return hose to the intake.


  13. Cold Air Intake is done... its not exactly pretty... but its cheap Razz it cost me around $40 all up.


Test Drive: after the CAI, i amost reached 140kmh in 3rd gear... it used to stop pulling at 6000rpm... now it pulls all the way to 7100rpm... and shift up to 4th and i reached 160kmh and still pulling hard... i had to stop coz shaun yelled "COPS! COPS! COPS!" Laughing

here is the video of the CAI sound. nothing new... just like any other CAI. ^_^

Link