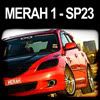
::visitor counter::
free hit counter

[ Click on thumbnails below to see all the posts of my babies and passion ]
Photobucket Photobucket Photobucket Photobucket Photobucket Photobucket Photobucket Photobucket Photobucket Photobucket

Friday, October 15, 2004

TEIN SuperStreet Coil Over

finally get to lowered my mazda3... my car was looking like a 4wd SUV for a while...

the suspension that i choose are: TEIN SuperStreet Coilover, with 16 level damping adjustment. was the only coilover available at that time... now plenty other brands around...

i only lowered it 35mm coz i just dont like it too low... i drive my car abit too hard sometimes... dont want to scraped anything underneath. but the tein can go up to 55mm low.... so probably next trackday i'll make it superlow... hehehe....

Tuesday, October 12, 2004

Summer Sunnies :P

visage left overseas and i dont know where to ask.... i've learn alot from him, but not enough... he leave me few of his magic book that open my eyes and give me more understanding rather than myth...

and then was wondering about what i can do while he is away....
i ended up doing simple rice mods for the coming summer... lol i call it 'summer bug' project :P ok its lame.

steps:
1. bought this head light cover from mazda dealer
2. bought 'night shade' special black transparent tinting spray can from supersheap auto.
3. spray the headlight cover.... 3 layers....
4. after i realise its too dark, then i use car's 'cut and polish' to thin it out

Sunday, September 26, 2004

[MERAH] update

[MERAH] update...

stage one nearly finish as my saving running low :P got a new job, but hav to start saving for house... well, i started [MERAH] feb2004, with stock condition: mz3 sp23 Velo Red, 5spd MTX, Sunroof, Cruise, tint, matt, hatch... and then a brief list of stage one: AEM cold air intake, Magnaflow 2.25, delete 2nd cat, Oil Catch Tank, AUTOEXE full bracing (front/rear sturt and sway), tein coilover SS, TWM short shifter, pivot shiftlight, RAZO pedal, 18" Racing Hart C4, Carbon fiber hood, 04 WRX bucket seats, slimline visor, LED mirror... yup that's it so far....

currently doing only 15.9 @ 114mph (cai + 2.25 xhaust) - with 105.7kw atw... i'm planning to switch back to 17' to shed 0.5 sec off... with semi slicks maybe

currently waitting on the xhaust Header to be redesign from Draxas, then lip and rear flip from garage vary... i'm not abig fan of bodykit, so i'm happy with lips... ordered autoexe grille, soon to be copied in carbon fiber... depending on the cost... otherwise i'll paint it black... then after all that, the stage 1 is completed... so its another 15-20% left....

oh, i'm going to Calder park on the 7th october to do another run in 17 and semi slicks... wish me luck... hopefully goes well... no rain please!!!

Sunday, September 12, 2004

Bracing and Handling upgrade ^_^

AUTOEXE handling and brace kit.
3 mount point - Front sturt bar / dual braces
4 mount pint rear sturt bar
2 pin adjustable rear sway bar 24mm
2 pin adjustable front sway bar 22mm

ordered it from japan thru RMS. thx to visage for the help installing front sturt bar. i somehow, by luck, managed to install the rear sturt bar and rear sway bar myself. and for the front sturt bar, i gave it to Nelson to install, coz i gotta take the cross member out and i got no hoist...

Saturday, August 28, 2004

painted engine cover

and then after few weeks of nothing to do with the car, i really want to add more red bits to my car.... then the engine cover and the interior strip in the next victim...

this mini project took me and visage almost 2 days to finish coz we stuffed up so many times... its our first time doing fine spray paint and we want it to be smooth and perfect...

preparation: took us few hours just to find the right red. finally got this "regency red" from autobodypaint spraycan. cost me $14.95. also plastic prime and grey prime (grey prime is needed when you want to paint color on a black base)


tips based on our mistake... lol:
1. do one thin layer at the time
2. for new layer using spray can, you have to layer it within the first 3 hours or leave it over night.... dont do it between 3hr to 24hr after the first application.
the reason is the chemical in the paint will start working after 3 hour, and if that working chemical reacting with the new chemical on the new layer after 3hr, then it will make the surface wrinkle, bubble, and peeling off...
3. be patient!

thx again to visage for the help

Thursday, August 12, 2004

Painted Caliper + EBC Green Stuff pads

after months trying to find performance parts for mazda3 ended up with no luck, i begin to rice my ride... Razz

the easiest think to add your brake performance is to paint it red... (huehehehe just kidding)

i use VHT hi-temp caliper paint, around $10-15 from normal auto shop like autobarn, supercheap, etc...

steps:
1. take off the caliper
2. clean it with methylated spirit and brush (carefull not to damage any rubber parts...)
3. let it dry
4. mask any moving parts and flex pipe. (rubber seal, caliper piston)
5. start spraying the caliper with thin layer... do it bit by bit.... and leave it for half an hours before you start installing it back
6. voila!


oh also i install EBC green-stuff brake pads to balanced out the between rice and performance mod... :


anyway, thx again to visage to help me doing this and teach me alot of stuff...

Monday, July 12, 2004

i was bored... then i made this in photoshop...

Friday, June 18, 2004

second 0-400m drag time

so i went to calder park again to try out my new mods:
AEM CAI, Magnaflow catback, take off the rear seats

i did 15.6sec @ 89mph on that day...

very disappointing for me Sad but i guess i need vtec Razz also need to use 17inch.... coz i think the 18 inch also affect the time... (its a common excuse for a slow poke Razz)

Saturday, June 12, 2004

AEM CAI

well... nothing wrong with my current modified airbox setup. but after tossing between upgrading my stock panel filter to K&N panel filter or just go for CAI system (cold air intake) i decided to go with a little bit more bling... lol

then i ordered my AEM CAI... took me and pehul27 3-4 hours to install it. (it meant to be 1 hr job) hueahahah... coz both of us dont know what we're doing.... and made lots of mistake... Razz

anyway... here we go... finally installed...


and then me and visage did extra mod to complete it... we cut a hole on the wheel well and put an old speaker cover on it... we do this because the AEM CAI is directly above it....

Cat Back Setup

i need some more grunt Razz. so here it is... my first performance mods...

de-restricted stock Intake (thx to visage):
- take off the resonator chambers on the intake... and leaving the stock airbox with stock filter on.
- put a flex pipe from the airbox to the front bumper grille to feed fresh air

benefit: higher air flow, more throttle response, nicer intake sound (esp on higher rev)


Exhaust:

this is stock mazda3 system (2inch):
- 4-1 header coupled with 1st cat
- then a second cat
- a pre-muffler
- a muffler


i use 2.5inch inlet and outlet magnaflow hi-flow SS muffler

then for the piping, i tried few different setups:
1. 2.25inch system with no second cat, with 2.25 resonator, and just 2.25 press bent pipe. still very restrictive.

2. no second cat and no resonator. replaced with 2.25inch mandrel bent pipe. higher flow but still very restrictive.

3. this is the last and the best setup so far. it is 2.5inch mandrel bent one piece straight pipe after the header and the first cat. all the way to the muffler, then press bent 2.25inch tail pipe after the muffler outlet for a bit of back pressure that was lost by opting 2.5inch pipe....

Saturday, May 01, 2004

First Drag 0-400m time

went to calder park with all the exe boys, trying out 400m rush for the 1st time...

i got the best run 15.9sec @ 87mph on that day.... car was stock, and with 18inch bling2 rims

Friday, April 16, 2004

The Concept! :)

and here are my photoshopped image of my car... this is how i want it to look like at the end.... its along way... but i'll get there somehow...

Monday, April 12, 2004

First few Mods + My first set of Wheels

first few mods:

- webasto holandia 700 sunroof

- cruise control
- tinted window
- paint protection
- sp23 matt

also some minor ricer mods ^_^:
- wide miror and mini boxing gloves for good luck*

*later on, i painted the ugly blue gloves to sexy red... habbah habbah

- stubby antenna


- RAZO G-Speed pedals


wheels:
Racing hart C4 - Gold - 18x7.5 +42offset - 9.5kg each


tyres:
pirelli p7000 225/40/18


Friday, March 12, 2004

[MERAH] - The Beginning of the Big Fat Snail


i bought these fat bubble march 2004... 2 days after i bought it, i reached 1000km already, blame it on paul for bringing me to Great Ocean Road. love the car, and love how it handle. it got good grips and balance for a passenger car.... Razz

but somehow what lack from it is the grunt... however, i dont need it yet as i couldnt even handle and use the available power to the max yet...

the basic figure for Mazda3 SP23 2004 (nothing to fancy):

Engine type: 2.3 litre 4 cylinder in-line 16 valve DOHC S-VT
Engine capacity (cc): 2,260
Bore and stroke (mm): 87.5 x 94.0
Compression ratio: 9.7 : 1
Maximum power: 115Kw @ 6,500rpm
Maximum torque: 203Nm @ 4,500rpm
0-100kmh: 8.3sec
0-400m: 15.9sec
top speed: 230kmh

Fuel system: Multipoint electronic injection
Fuel tank capacity: 55 lt
Fuel consumption: (manual) 9.0lt/100km
Transmission Ratios
1st - 3.307
2nd - 1.842
3rd - 1.310
4th - 0.970
5th - 0.755
Reverse - 3.166
Final drive - 4.388

Chassis and Suspension
Front brake: Ventilated disc - 300mm
Rear brake: Solid disc - 280mm
Front suspension: Independent MacPherson strut with coil springs and double acting shock absorbers
Rear suspension: Independent multi-link with low profile springs and cylindrical double acting shock absorbers
Steering: Electro hydraulic power assisted (engine revolution sensing) rack and pinion
Turning circle: 10.4m
Tyres: 205/50R17 89V
Wheels: 17 x 6.5 J (alloy) - offset +52 - 9.5kg
Spare tyre/wheel: Temporary/Space saver

Dimensions
Overall length: 4,540mm
Overall width: 1,755mm
Overall height: 1,465mm
Wheelbase: 2,640mm

Ground clearance - laden: 121mm
front track: 1,530mm
rear track: 1,515mm
Kerb weight 1,232Kg


so... lets the modding begin...
2 main things to upgrade... 1 is the driver skills, 2 is the car... Smile

Thursday, January 01, 2004

1st post ever - who is flameboy

like fire like me....

Yes or No... i hate grey area...

always made mistake but learnt from it and get back stronger :P

presistent, stubborn, breakin the rules, sugar overdose, always moving around for no particular reason... my mood swings but im pretty predictable to those that are close to me... im pretty explosive, but if handled correctly can be non-flamable... :P

im addicted to speed, at the moment are learning how to drive properly on circuit/track... :)

i love my family (mom, dad, my 2 sis, and 1 lil bro) they can be pain in the ass sometimes but they always be there for me at the hardest time of my life... never once they let me down... thx for the understanding...

my dear friends are the 'fuel' of my flame... they cheer me up on good times and bad times... there is no way i would give up friendship for anything else...

my dogs are stupid, but they're so adorable that i cant throw them away... lol

moto: its not 'how did you fell' but its 'how will you get back up' is more important to me... never give up... and always trying to be myself...

cheers,
Fb