


some ppl might know it already.... but i guess its about time for me to post about it
mazda3 SP23 has been a great car too me.... its just the gearbox and the engine mounts problem that happened more than once.... i just dont want to wait for the next time it happens again... so i decided to fix everything then sell it...
at the moment has been returned to stock form and most of the parts has been sold....
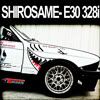
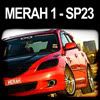
FINAL SPEC: MERAH
march2004 - august2006
PERFORMANCE
0-100km/h (sec):
6.7 sec (tested with G-Tech, mod: header, intake, catback)
BEST QUARTER – MILE:
15.07sec @ 108.88* mph on Heathcote Raceway. (mod: header, intake, catback)
BEST TRACK RESULT:
1:51.5 at Winton Raceway long track (3km)
Mod: bridgestone RE070, coilover, intake, catback, F&R strurt and sway bars
Haven’t done one with the current mods
POWER OUPUT:
109.7KW ATW @ 6900 RPM (mod: header, intake, catback) @ Dynamic Dyno.
DYNO PLACE / CONTACT WORKSHOP & NAME: Pro-Tek automotive: 03 9484 3117
*the trap speed on my best run is inaccurate. my other run on that day only ranging from 97-100mph
AUXILIARY PARTS
ECU: Microtech LT10 (in development)
AIR FILTER: AEM cold air intake
EXHAUST PIPE: 2.5inch mandrel bent
MUFFLERS: Magnaflow with 4inch Aluminium SE Magnaflow tip
EXHAUST MANIFOLD: Custom 4 – 1 setup. 1 7/8inch primary & 2.5inch collector. Ceramic coated
OTHER: Oil Catch Tank
TRANSMISSION
FLYWHEEL: EXEDY lightweight
CLUTCH PLATE: MAZDASPEED
PRESSURE PLATE: MAZDASPEED
GEARBOX FITTING/MODS (in progress):
- MTX75 conversion
- Torsen 1.5 LSD
- 4.06 final drive
- Nitride Treatment
- TWM short shifter
- Redline MT90
- Billet Driveshaft
- Custom mounts
- Adapter plate
HANDLING AND SUSPENSION
COILOVERS: TEIN Superstreet (front 45 mm rear 40mm)
FRONT SWAYBAR: AUTOEXE 22mm
REAR SWAYBAR: AUTOEXE 22mm
FRONT STURT BAR: AUTOEXE Front 3 points
REAR STURT BAR: AUTOEXE Rear 4 points Sturt Bar
ENGINE MOUNT: AWR rear Engine mount
OTHER: TEIN Electronic Damping Force Controller
BRAKES - FRONT
CALIPER:
WILWOOD 6 piston calipers - Forged SuperLite
ROTOR:
HD 13" x 1.1" wide, vented, directional rotors.
Gas slotted, zinc plated.
Aluminum rotor hats.
Steel mounting brackets.
PADS:
Wilwood BP10 pads.
OTHER
Stainless steel braided hoses.
BRAKES - REAR
CALIPER:
Stock BK3P rear caliper
ROTOR:
Direct replacement 11.75" non vented rotor for stock caliper, retaining parking brake.
Gas slotted and zinc plated.
Aluminum rotor hats.
Steel Caliper mounting brackets.
PADS:
EBC Green stuff
OTHER
Stainless steel braided hoses.
WHEELS & TYRES
STREET:
WHEEL BRAND: KYOYA MODEL: CE28 copy
DIAMETER & WIDTH (FRONT & REAR): 18x7.5 +42
TYRE BRAND (FRONT & REAR): Goodyear Eagle F1 GSD3
SIZE: 225/40/18
TRACK:
WHEEL BRAND: ROTA MODEL: ??
DIAMETER & WIDTH (FRONT & REAR): 17x7 +40
TYRE BRAND (FRONT & REAR): Bridgestone RE070
SIZE: 225/45/17
EXTERIOR BODYWORK
‘Carbon Products’ – Vented Carbon Fibre Bonnet
Custom Bonnet paint
Valiant Front Lip
Valiant Front Grill
Valiant Rear Roof Spoiler
Custom paint Engine cover
OTHER BODY MODS:
JDM slimline Visor
Satin Fuel Door
SUNROOF - Webasto Holandia 700
INTERIOR
SEATS: WRX 2004 conversion Seats
PEDALS: RAZO – G speed 4 Piece
MISC:
Pivot 3 stages Shiftlight
DIY painted interior plastic stripe
DIY painted Caliper
DIY Painted engine cover
DIY center dash 3 gauges holder
Door sills
Leather shift boot cover
Saturday, August 26, 2006
COMPLETED [MERAH]
Tuesday, August 15, 2006
yay! 90% completed... MERAH is almost complete
FINALLY.... MERAH is running again... habbah habbah.... few minor things to do still.... replace the driveshaft and fix the door... but apart from that, the car is running and test drove it with desmond few days ago, and it was fine, except ofcourse the driveshaft grinding....
updates on MERAH:
progress: 90%
Duration: 24 hours (5 nights)
night 14 (3 hours)
night 15 (4 hours)
night 16 (5 hours)
night 17 (5 hours)
night 18 (7 hours)
the next day, i was driving to thao's work place and the drive shaft came loose... lol.... oh well, as long as i dont drive over 60kmh, its fine....
thx to: kenny/kthl, mark/cully5, jason/unco, desmond/nismo14 for the help and the support.... as i always said.... i couldn't have completed it without any help from all of you.... thx guys...
damage report during the process: snapped brake hose, rear brake piston dust seal, crank sensor, drive shaft clip.... ![]()
Tuesday, August 08, 2006
another progress - 60% completed
sorry guys, i've been abit busy lately.... i'll try to finish and get back as soon as possible....
updates on MERAH:
progress: 60%
Duration: 32 hours (9 nights)
night 5 (3 hours)
night 6 (3 hours)
night 7 (4 hours)
night 8 (6 hours)![]() *
*
night 9 (2 hours)
night 10 (4 hours)
night 11 (4 hours)
night 12 (2 hours)
night 13 (4 hours)
thx to: jason/unco, kenny/kthl, mark/cully5 for the help and company.... much appreciated.... special thx for irawan/visage for the help and supervision... without you, i will never get those driveshaft and hoses out! geeeez.... thx man....
can wait to finish it.... this things supposed to take far less amount of time... but i'm not a mechanic and this is my first time pulling car appart.... the hardest part is about to come.... putting everything back together... ![]()
oh well... wish me luck...
Thursday, August 03, 2006
few pics of the process
so here is the handsome gearbox, the famous MTX75 with 4.06 final drive... woohooo...
here is the pics of my intake *jase, i dont thing you would want it anymore ![]() * it got dent in it caused by hitting the chasis when the engine dropped on angle
* it got dent in it caused by hitting the chasis when the engine dropped on angle
the hole one the gearbox is cause by the engine mount... the mount actually holding at where the hole at
and this is the poor engine mount snapped into 3 pieces... the other pieces still stuck on the gearbox....
the right driveshaft also broken and get pulled off from the connector boot when the engine mount snapped....
hanging by the crane ![]()


Tuesday, August 01, 2006
healing process begins
refunded the ford shifter... i found a way to just use and modify the mazda3 shifter.... all i need is a welder.... ![]()
anyway.... updates on MERAH:
progress: 10%
Duration: 14 hours (4 nights)
night 1 (2 hours)
night 2 (4 hours)
night 3 (4 hours)
night 4 (4 hours)
thx to: mark/cully5 for sitting around, smoking, finish my coke and calling me stoopid... ![]() jk bro.... thx for the help...
jk bro.... thx for the help...